|
McCloud River Railroad reviews: R. Duck Locomotive Works Wood Model of the McCloud River #9 |
|
|
R. Duck Locomotive Works started producing large wooden kits of locomotives and railcars in 2021. In 2024 I became aware the company planned to start producing a model of the McCloud River #9, a 2-6-2 the railroad purchased new from Baldwin in 1901. The #9 had a long career on the McCloud, which save for a couple years spent in storage during the depths of the Depression lasted until 1939. The nearby Yreka Western then purchased the #9, who in turn sold it to the Amador Central Railroad in 1942. Amador Central then sold the #9 to the Nezperce & Idaho Railroad in 1945. Railfans discovered the #9 in the early 1960s sitting derelict in an Idaho farm field, and one of them purchased the #9 and shipped it to the Mid-Continental Railroad Museum in North Freedom, Wisconsin, for restoration. The #9 then operated from 1972 to 2001 on the Kettle Moraine Scenic Railroad out of North Lake, Wisconsin. The Age of Steam Roundhouse purchased the #9 and moved it to their facility in 2015. The #9 model kits are exclusively distributed through the Age of Steam Roundhouse, and I acquired one of them once available. Building the model took a few weeks, but now that it's done I wanted to share the finished work along with my construction experience, notes, and impressions. |
|
|
 |
One of R. Duck's pilot models of the #9 on the real #9 at Age of Steam. Tripp Aquadro/R. Duck photo. |
|
|
The kit arrived in a large box, a little less than 21" long, 6" wide, and 3" tall. The kit consists entirely of parts laser cut into 20 wooden sheets, 17 for the locomotive and tender plus three display track pieces. Each part is held into the sheet by one or more small tabs, I used a hobby knife to cut through the tabs to release the parts. I did encounter a few cases where burs from the surrounding sheet would break off with the part, but those were all easy to cut and then sand or file off. I also had a few pieces of parts that broke off and remained with the sheet, but when that happened I was able to cut the piece off and reattach it to the part with a small dot of glue. I also encountered two or three parts where the laser cut did not quite get all the way through the sheet, but I was able to finish those cuts with the hobby knife. The kit does not contain any instructions, those are available instead as downloads from the R. Duck website. The manual for the #9 runs 150 pages long, so I downloaded it to my phone and started work. |
|
|
 |
The first page of the construction manual. |
 |
Two of the sheets containing kit parts. |
 |
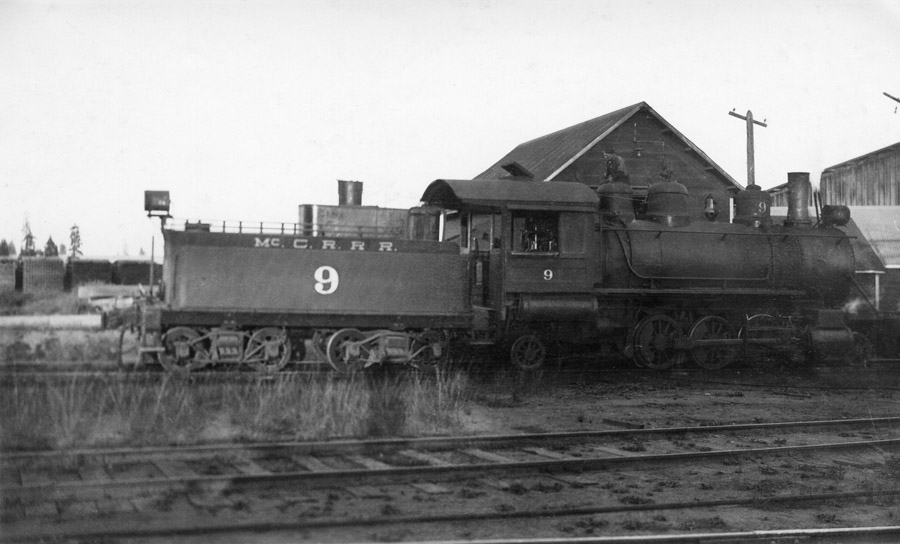
A view of the #9 late in its McCloud career, which is the version of the #9 the model as I built it most closely represents. T.E. Glover collection. |
|
|
The kit also does not contain any glue, which is a requirement for most steps in the model build. I used a clear gel tacky glue purchased from a local craft store that worked really well. I followed the kit instructions step by step, starting with the three display track pieces which provided an invaluable orientation to how the pieces come out of the sheets and then fit together. The tender came next after the tracks. I encountered my first minor issue with the kit at this stage. The instruction manual shows exploded views in each step about how the parts needed go together, with a few minimal notes added for some key steps, such as ensuring round parts designed to rotate within other parts need to be sanded smooth and when and where lubrication needs to be applied as well. I could have used a couple other construction notes or reminders at other points. The specific issue I encountered at this stage involved assembling the wheels, which involves a series of larger concentric rings glued around a disk that press fits onto the axle ends. I got so involved in assembling the wheels that I overlooked making sure the wheels were then mounted straight on the axles and I ended up with one badly crooked wheel that prevents the tender from rolling freely on the display tracks. It was a good lesson learned as I progressed on to the locomotive. One other note, the locomotive comes with parts so that it can either be built as a wood burner with a diamond stack or as an oil burner with a straight stack, McCloud River made that conversion on the locomotive in July 1921. I chose to build the model as an oil burner, which involved constructing the oil bunker on the tender. |
|
|
 |
One of the three pieces of display track included with the kit. Not shown are the track joiners that hold the completed track pieces together. |
 |
The completed tender on a piece of display track. |
|
|
Work on the locomotive commenced once I finished the tender. Overall the job went smoothly, and it quickly became apparent the amount of thought that the design. One of the issues I ran into a few times is that the various parts of the model are not identified in the instructions or on the sheets, and a lot of the parts look very similar to each other especially when viewed on the small screen of a phone.. There were a few times I cut some parts out of the sheets only to then determine it was the wrong part for that stage, and as I went through the build I had a small but growing pile of such parts. It often times took taking a really close look at very subtle visual cues on the parts and in the illustrations to determine what parts got used at what stages. Another small issue I ran into a few times is the steps where glue should not be used, those are not called out either, and sometimes places where glue should not be used was not immediately apparent until I got to the next stage. I narrowly avoided minor disasters a couple times. One other minor issue I experienced stemmed from minor warping of the sheets that ended up causing a few of the longer structural pieces to also be slightly warped, I ended up having to rubber band some pieces together until glue cured enough to hold a few of the warped pieces in place. The only significant problem I had came at the mating the boiler to the frame stage, I ended up having to disassemble parts of the cylinders in order to get the parts to fit together and then reassemble the cylinders, in retrospect it appeared the cylinders probably needed to be assembled and installed after the boiler had been mounted. Following are photos of the rest of the model assembly. |
|
|
 |
The frame and running gear assembled but before drivers had been installed. |
 |
The drivers and side rods are now in place. |
 |
The boiler has just been installed on the completed frame. |
 |
A side view of the boiler on the frame shortly after that stage had been completed. |
 |
The model after the smokebox cover had been installed. |
 |
Work shifted to the back end of the locomotive once the front end had been completed. This view shows some of the extra details burned into the wood. |
 |
A look into the completed cab before I installed the cab roof. There is an impressive level of details inside the cab. |
 |
The engineer's side of the finished model. |
|
|
Overall this is a beautiful model. It is large, measuring out at roughly 26 inches long, 7 inches high, and roughly 4.25 inches wide. While I did not end up needing them, I did appreciate that the sheets included at least one and sometimes many duplicates of the smaller or more fragile parts. There are some pictures out there of people who have painted their R. Duck models, I plan to leave mine in the natural wood state to preserve the levels of detail. The kit did end up being short one piece, but fortunately it was the front piece to the fireman's seat, and its absence is not noticeable on the finished model. The only very minor issue I had with the model is that the sheets were all finished on one side and raw on the other, and a number of the parts on the locomotive that are used on both sides of the model are cut with the same orientation on the sheets, leaving the finished side facing out on one side of the model and the raw back side of the sheet facing out on the other side. At least one major piece, the bracket for the air pump, was also cut into the sheet so that the finished side is up against the boiler and the raw side is facing out. These are, however, minor issues that do not significantly detract from the overall model. R. Duck is to be commended for producing a unique, well thought out, and atractive model of the McCloud River #9. I thank them for making this model available and highly recommend it. Links: R. Duck Locomotive Works Homepage Age of Steam Roundhouse Store Page for the Model |
|
|
 |
A front three-quarter view of the completed model. |
 |
The fireman's side of the completed model. |
 |
The front of the completed model. Hopefully R. Duck will eventually make spot plates for the models. |
 |
The smokebox door is one of the operable parts on the model. This view provides a look at the details inside the smokebox. |
 |
The rear of the model. The water hatch on top of the tender also moves, as does the firebox door in the cab. |
 |
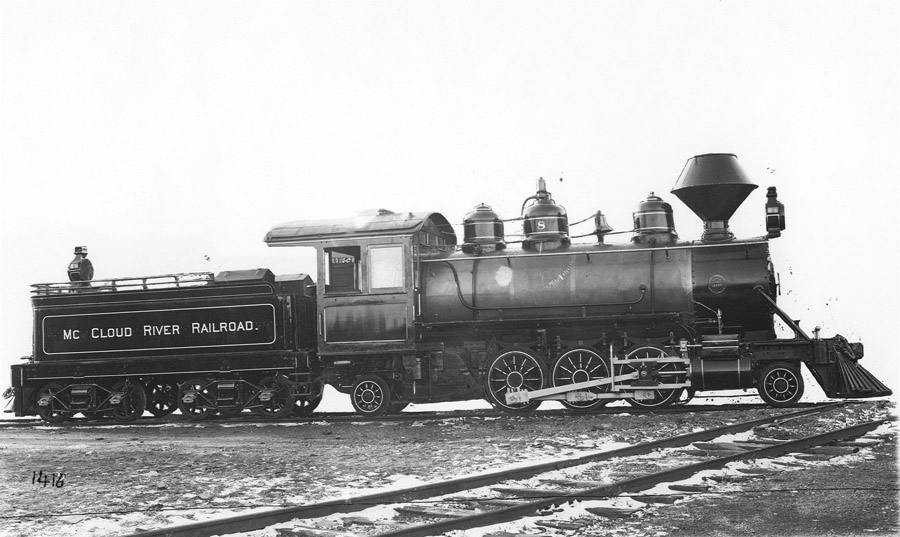
The #9 as the second unit in the order did not gets its own Baldwin builder's portrait, so the one from its twin #8 will have to suffice. |
 |
I only felt it appropriate to create a builder's photo of the model in the spirit of the Baldwin portraits once I completed it. |
|
|